

Mix baking soda with water to form a paste, then spread it over the grout lines. Spray white vinegar on top and let it fizz for 10 minutes. Scrub with a stiff brush, rinse with warm water, and dry. For tough stains, swap in hydrogen peroxide or oxygen bleach.
Grout looks simple, but it causes more headaches than the tile it sits between. It soaks up spills, traps soap scum, and holds onto moisture long after you’ve finished mopping. Over time, that combination turns bright white grout lines gray, yellow, or even black.
The good news is that you don’t need expensive tools or a professional crew to fix it. Most grout stains respond well to items already sitting in your kitchen cabinet. This guide walks you through exactly how to clean tile grout, tackle stubborn stains, and keep it looking fresh for months at a time.
Why Grout Gets Dirty So Fast
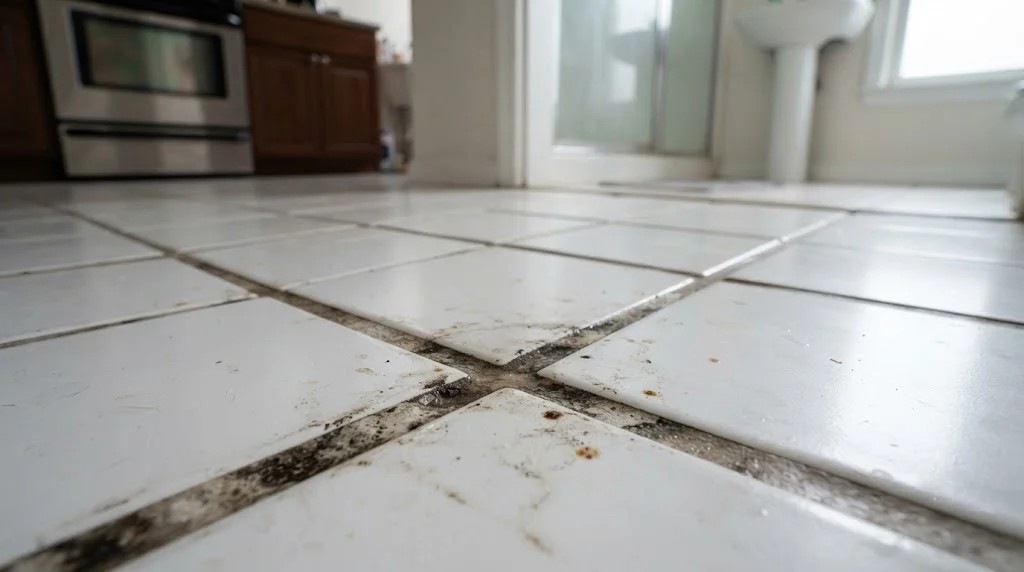
Grout is porous. That’s the short answer for why it stains faster than the tile around it. Tile has a smooth, sealed surface that resists dirt, but grout has tiny pores that pull in liquid, grease, and dust like a sponge.
In the kitchen, cooking grease settles into those pores every time you fry something on the stove. In the bathroom, soap residue and hard water minerals build up with every shower. Add in moisture that never fully dries, and you’ve got the perfect setup for mold and mildew to move in.
Foot traffic makes things worse. Dirt from shoes grinds into grout lines and works its way deep into the surface, which is why entryway and mudroom grout often looks dingy no matter how often you sweep.
What You’ll Need Before You Start
Before you scrub anything, gather your supplies so you’re not running back and forth. You’ll want baking soda, white vinegar, a spray bottle, and warm water for the basic method. A stiff grout brush or an old toothbrush works well for scrubbing, since the small head fits neatly into narrow lines.
Keep a couple of microfiber cloths nearby too. They pick up loosened dirt without scratching the tile, and they leave less lint behind than paper towels. If your grout has serious stains, grab hydrogen peroxide, dish soap, or oxygen bleach as backup options. Gloves are worth wearing any time you work with bleach or peroxide, since both can irritate skin with repeated contact.
The Baking Soda and Vinegar Method
This combination works for most everyday grout, and it’s the method most cleaning pros recommend first because it’s cheap, safe, and effective on ceramic and porcelain tile.
Start by mixing baking soda with a small amount of water until it forms a thick paste, similar to toothpaste. Spread a thin layer directly onto the grout lines using an old toothbrush or your fingers with a glove on. Once the paste is down, spray white vinegar over it. You’ll see it bubble immediately, which means the reaction is breaking down grime and lifting it away from the surface.
Let the mixture sit for 10 to 15 minutes. This gives the vinegar time to loosen dirt trapped deep in the pores. Then scrub the grout lines in small circles using a stiff brush, applying steady pressure without pressing so hard that you damage the surface.
Rinse everything with warm water and dry the area with a clean towel. Skipping the drying step lets moisture sit in the grout again, which defeats the purpose of cleaning it in the first place.
Cleaning Tough Stains With Hydrogen Peroxide
Some stains laugh at baking soda and vinegar. Old grease spots, deep discoloration, and mold that’s settled in for months need something stronger, and hydrogen peroxide fits the job well.
Mix three-quarters of a cup of baking soda with a quarter cup of hydrogen peroxide and a tablespoon of mild dish soap. Stir until it forms a thick paste, then apply it to the stained sections with a brush or old cloth. Let the mixture work for 15 minutes before scrubbing.
Hydrogen peroxide acts as a gentler alternative to bleach, and it handles mold in bathrooms particularly well. One thing to know before you start: it can lighten colored grout over time, so test a small hidden spot first if your grout isn’t white.
Using Bleach for Stubborn Black Stains
Bleach gets results fast, but it comes with tradeoffs. Frequent use weakens grout over time and can cause it to crumble, so save this method for stains that nothing else has fixed.
Dilute three-quarters of a cup of bleach in one gallon of water, then pour or spray the solution over the stained grout. Let it sit for 15 minutes before scrubbing with a nylon brush. Rinse thoroughly afterward, since leftover bleach residue can irritate skin or damage nearby fabrics and rugs.
If you’d rather boost the bleach’s power, mix it with baking soda instead of water. Combine the two until you get a paste with a consistency similar to toothpaste, apply it to the grout, and let it sit for 15 minutes before scrubbing and rinsing.
The Dish Soap and Water Option
Not every grout job calls for a strong chemical mix. For light, everyday grime, dish soap does the trick without any risk to your grout’s color or texture.
Add a few drops of dish soap to a bucket of warm water and mix until it’s slightly sudsy. Dip a microfiber mop or cloth into the solution and wipe down the grout lines, working in small sections so the water stays clean. This method works especially well for weekly maintenance, since it removes surface dirt before it has a chance to settle into the pores.
Avoid using a sponge mop for this step. Sponge mops tend to push dirty water straight into the grout lines instead of lifting dirt away, which can actually make staining worse over time.
Steam Cleaning for a Chemical-Free Clean
If you’d rather skip chemicals altogether, a steam cleaner offers a solid alternative. The high heat loosens dirt and kills mold without scrubbing, which makes it a good choice for people with sensitive skin or households with young kids and pets.
Sweep or vacuum the floor first to clear away loose dust and debris. Fill the steamer with water only, since most manufacturers warn against adding cleaning solutions to the tank. Once it’s heated up, run the steam function over the grout using the attached brush head.
Dry the area thoroughly with a towel or mop once you’re done. Steam cleaning can strip away grout sealant along with the dirt, so plan on resealing the grout soon after if it was previously treated.
How to Keep Grout Clean Longer
Cleaning grout once won’t keep it that way forever, but a few habits make a real difference. Wipe up spills as soon as they happen, since wet dirt becomes far harder to remove the longer it sits on tile or grout.
In bathrooms, dry the floor with a towel after every shower and run the ventilation fan for at least twenty minutes afterward. This single habit does more to prevent mold than any cleaner you could buy. In kitchens, sweep and mop weekly to stop grease from building up between deep cleans.
Sealing your grout offers the biggest long-term payoff. A quality sealer creates a barrier that keeps liquid and dirt from soaking into the pores in the first place. Most sealers last between six months and a year depending on foot traffic, so mark your calendar and reapply before stains have a chance to set back in.
When to Call a Professional
Some grout problems go beyond what household cleaners can fix. If stains keep coming back no matter how often you scrub, or if you notice grout crumbling and pulling away from the tile, it’s time to bring in a professional. A specialist can deep clean using industrial-grade equipment, or recommend regrouting sections that have worn past the point of repair.
Persistent mold is another sign to call for help, especially if it keeps returning after you’ve cleaned and dried the area properly. Deep-set mold sometimes grows beneath the surface where household tools can’t reach it, and a professional has the equipment to treat it at the source.
With the right method and a bit of regular upkeep, your grout can look close to new again. Pick the approach that matches your stain, give it time to work, and follow up with a good seal to protect all that effort.