

Spooky Halloween wall decor ideas turn plain walls into the center of your October display. Try a haunted gallery wall, paper bat swarms, shadow silhouettes, a window scene, or a DIY potion shelf. Most projects cost little, take one afternoon, and peel off without damaging paint.
Why Your Walls Deserve Some Halloween Love
Most people start Halloween decorating on the porch or the dining table. The walls stay bare, even though they take up more space than anything else in the room. That’s a missed chance. A wall is the first thing your guests see when they walk in, and it sets the mood right away.
Wall decor also has a few practical perks. It stays out of the way, so kids and pets can’t knock it over. It takes up no floor space, which helps in small apartments. And you can switch it out fast when November rolls around.
I’ll walk you through twelve ideas here. Some take ten minutes. Others need a whole Saturday. Pick the ones that fit your time, your budget, and your comfort level with scissors and glue.
Start With a Theme Before You Buy Anything
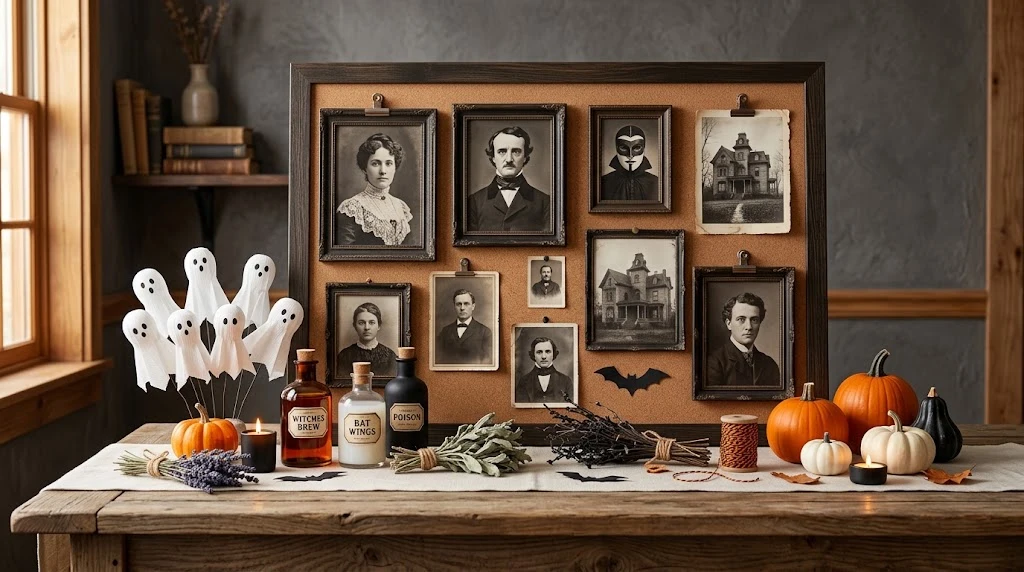
Before you grab a single paper bat, choose a look. A theme keeps your decor from feeling random. It also stops you from buying ten things that don’t match.
Think about what makes you smile. If you love old black-and-white horror movies, go vintage and gothic. If you like a playful feel, pick friendly ghosts and pumpkins. If you like witchy scenes, lean into potions, herbs, and candles. Decorators at Govee suggest a witch’s apothecary as a trending choice, with glass bottles of colored “elixirs,” dried herbs, old books, and candles grouped together.
Pick two or three colors and stick with them. Black, orange, and purple are the classics, but black, white, and gray look great too. A limited palette makes even cheap decor look planned.
Build a Haunted Gallery Wall
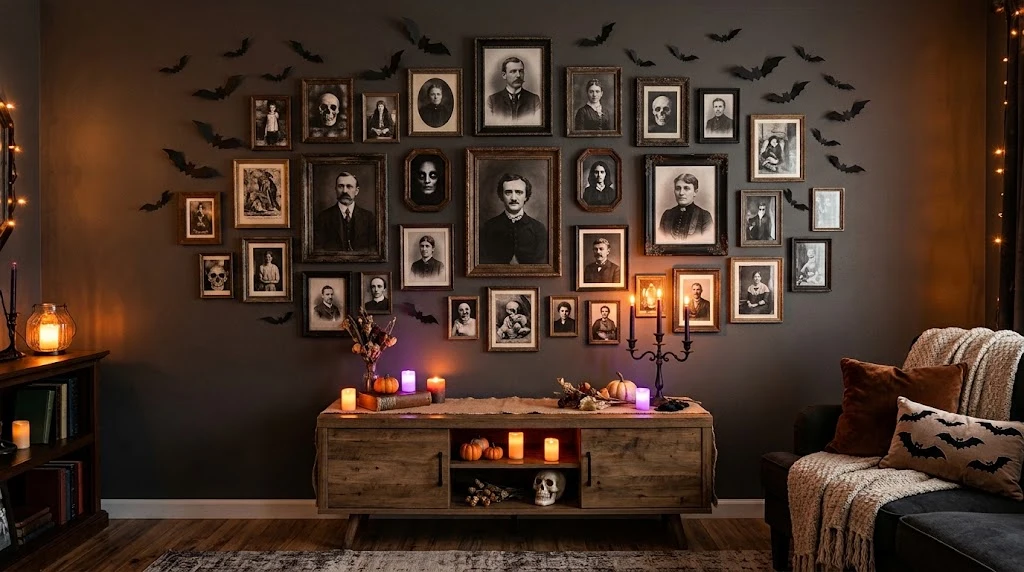
A haunted gallery wall is one of the easiest ways to get a big spooky effect. You swap your normal family photos for eerie portraits. Guests often take a minute to notice, and then they get a little creeped out.
Start by finding old-looking portraits online. Public domain museum collections are a good source, and they cost nothing. Print the images in black and white, then rub a tea bag over the paper to give it an aged, yellowed look. Let the pages dry flat before you frame them.
Mix frame sizes and shapes for a collected look. Thrift stores sell dusty, mismatched frames for a dollar or two each. Spray paint them all matte black if you want a uniform look. Then add a few small LED candles on a nearby shelf so the faces seem to flicker.
Hang a Swarm of Paper Bats
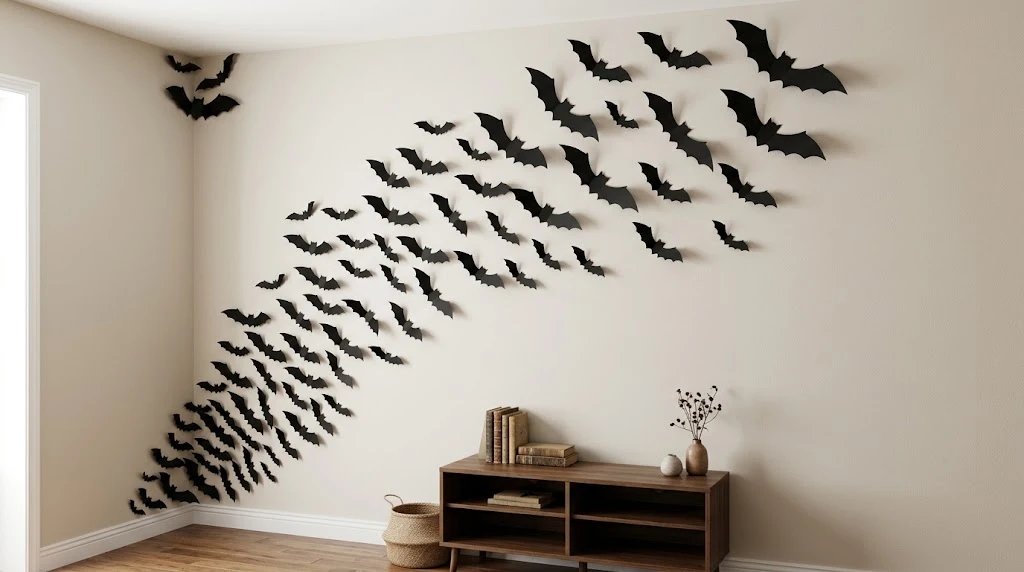
Paper bats are cheap, quick, and always look good. A single bat looks small. Fifty of them climbing a wall look like an invasion.
You can cut your own from black cardstock or buy them ready-made. Bob Vila’s 2026 decor roundup features a set of 60 three-dimensional bat stickers in four sizes, attached with removable adhesive strips that won’t peel paint. If you’d rather save money, trace one bat on cardboard, cut it out, and use it as a template for the rest.
Place the bats in a loose stream that starts small near a corner and grows larger as it moves toward the ceiling. Vary the sizes, and fold each wing slightly upward so the bats stand off the wall. That small fold creates soft shadows and makes the flock look like it’s moving. Use painter’s tape or putty, not regular tape, to protect your paint.
Create Shadow Silhouettes With Light
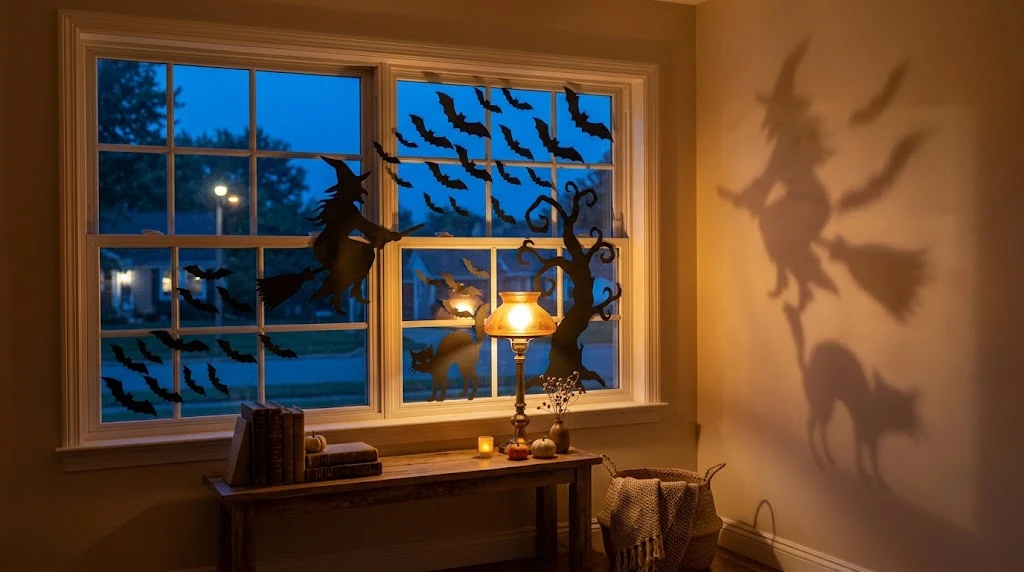
Silhouettes look dramatic, and they need almost no supplies. You cut a shape from black paper, then place a light behind or beside it. The wall does the rest.
Try a witch on a broomstick, a cat arched on a fence, or a haunted house with crooked windows. For a window scene, tape black paper shapes to the inside of the glass and turn on a lamp behind them. From outside and inside, the shapes stand out sharply.
You can also use the wall itself as a screen. Mount a cardboard cutout a few inches from the wall and aim a clip light at it from the side. The shadow grows larger than the object. Move the light closer to make the shadow bigger and blurrier, or farther away for a crisp outline. Test a few positions before you commit.
Turn Plain Fabric Into Cobwebs
Cobwebs are a Halloween staple, but store-bought stretch webbing often looks clumpy. A better option is to make your own. All you need is cheesecloth, white glue, and a little patience.
Soak strips of cheesecloth in a mix of half glue and half water. Drape them over the wall corner, pull them into stretched shapes, and pin them in place. Once dry, they hold a lacy, tattered shape that looks genuinely old. You can also pull apart cotton stuffing into thin strands for a fine, wispy web.
Place webs where spiders would actually build them. Corners, the gaps behind frames, and the top of a doorway all work well. Add a few black plastic spiders for scale. One large spider near the ceiling draws the eye and gives the scene a focal point.
Make a DIY Potion Shelf
A floating shelf covered in potion bottles is a spooky Halloween wall decor idea that also works as a small scene. You can build one with very few materials. Even a plain bookshelf works if you don’t want to install anything new.
Gather clear bottles, jars, and old glasses. Fill them with water tinted by food coloring, and seal the lids with hot glue so nothing spills. Print small labels with names like Bat Wing Tonic, Swamp Water, or Potion Number Thirteen. Brush coffee on the paper to give the labels an old, stained look.
Add props around the bottles. Dried flowers, old books, a mortar and pestle, and a few candles make the shelf feel lived in. Use battery-powered candles only. Real flames near paper labels and dried herbs are a fire risk you don’t need.
Paint a Mural Without Painting Your Wall
A large mural makes a huge impact, but most renters can’t paint their walls. There’s an easy fix. Tape a big sheet of butcher paper or a plain bedsheet to the wall and paint on that instead.
Choose a simple scene. A graveyard hill, a twisted tree, or a haunted house against a full moon all work well. Start with a dark background, such as deep purple or navy. Then add a pale moon and black shapes in front of it. Layering dark shapes over lighter ones gives the scene depth without any advanced skill.
If painting feels like too much, try removable wallpaper or large window clings. Both come off cleanly when the holiday ends. Some decorators even project a scene onto the wall with a projector and trace the outlines. That way you get a polished look without drawing freehand.
Use Lights to Set the Mood
Good lighting can make cheap decor look expensive. A poorly lit wall looks flat, no matter how much you hang on it. A few well-placed lights change everything.
Orange and purple string lights are an easy starting point. Run them along the top of a wall or around a large frame. Green bulbs work well for a witchy or swampy look. Red light, placed low, gives a creepy glow that feels like a horror movie set.
Turn off the overhead lights during parties. Small lights create pockets of shadow, and shadows are where the scares happen. If you have smart bulbs, set them to a slow flicker. Just check that all your cords are taped down and away from walkways so nobody trips.
Hang Floating Candles and Ghosts
Floating decor adds height to a wall display. You attach it to the ceiling and let it hang down in front of the wall. It gives the room a layered feel.
For ghosts, drape white cloth over a balloon or a foam ball, then tie the cloth under the ball with string. Draw a face with a black marker. Hang several at different heights, using clear fishing line so the string disappears.
For floating candles, use battery-powered taper candles and thread them through clear line as well. Hang them in groups of five to seven at various lengths. Place them in front of a dark wall, where the glow shows up best. Kids love this one because it looks like something from a wizard school.
Decorate With Spooky Words and Signs
Text adds personality. A short phrase on a sign tells guests what kind of house they’ve entered. It also takes just a few minutes to make.
You can write phrases on wood plaques, chalkboards, or cardstock. Try lines like “Enter If You Dare,” “Beware of the Cat,” or “The Witch Is In.” Use a font with thin, stretched letters for a creepy look. Dripping paint letters work too. Just add a few drips under each letter with a small brush.
Keep the signs small and spread them around. One sign over the couch, one near the kitchen, and another by the door gives the house a story. If you want a funny twist, hang a fake “house rules” poster with rules like “No Garlic” and “Ghosts Must Use the Door.”
Make Decor That Kids Can Help With
If you have children, wall decor is a great project to do together. The steps are simple, the mess is small, and everyone gets to show off the finished work. Kids often remember these crafts years later.
Let them make paper ghosts from white construction paper, or trace their hands to create spooky black cat shapes. Googly eyes stuck on almost anything make it look friendlier. Hang the finished pieces on a string across the wall, like a banner, using clothespins.
Keep sharp tools for adults only. Let kids handle safe jobs, like coloring, gluing, and choosing where things go. A wall of kid-made art also works as a great photo backdrop on Halloween night.
Protect Your Walls and Plan for Cleanup
Nobody wants a wall full of tape marks in November. A little planning prevents damage. The easiest fix is to choose removable products from the start.
Painter’s tape, removable adhesive strips, and putty all release without pulling off paint. Test a small hidden spot first, especially on wallpaper or fresh paint. Press decor on gently and let adhesive strips set for an hour before adding weight. Heavy items, like frames, need hooks rated for their weight.
When the holiday ends, peel the tape slowly at an angle, not straight out. Store paper bats and signs flat in a labeled box. Keep fabric items in a separate bag so they don’t pick up dust. Next year, you’ll save time, and you can add one or two new pieces instead of starting over.
Stay on Budget and Keep Things Safe
You don’t need to spend much to make a good display. A full set of cardstock costs only a few dollars, and thrift stores are full of cheap frames. Dollar stores sell small jars, battery candles, and plastic spiders. Often, the most creative pieces come from things you already own.
Safety matters more than style. Use only battery-powered candles and LED lights near paper, fabric, and dried plants. Keep cords off the floor, and never plug too many strings into one outlet. If you hang items over a doorway, make sure they sit high enough that tall guests won’t walk into them.
Think about the people who visit your home. Flashing lights can bother some guests, including those who get migraines or have photosensitive conditions. Loud or jump-scare pieces can upset small children or pets. A quick look around with your guests in mind makes the night more fun for everyone.
Bring It All Together
The best spooky Halloween wall decor ideas share one trait: they use what you have and add a little imagination. You don’t need a big budget or fancy skills. A few paper bats, some framed portraits, and a couple of lights can change a room in under an hour.
Start small if you feel unsure. Pick one wall, choose one idea from this list, and finish it this weekend. Once you see how it looks, you’ll probably want to add more. Halloween is a good time to try something silly, and your walls are ready for it.
Now it’s your turn. Which wall in your home will you haunt first? Grab some black paper, find a roll of painter’s tape, and get started. If you’d like, I can put this article into a file you can download.