

Bypass sliding doors solve a common kitchen problem. They close off your pantry without stealing floor space from a swinging door. If you’re tired of a door that blocks your walkway every time you grab a can of soup, this project is worth a weekend.
This guide walks you through the entire process. You’ll learn what bypass doors are, how to pick a style, and how to install them step by step. We’ll also cover common mistakes and how to avoid them.
What Are Bypass Sliding Doors?
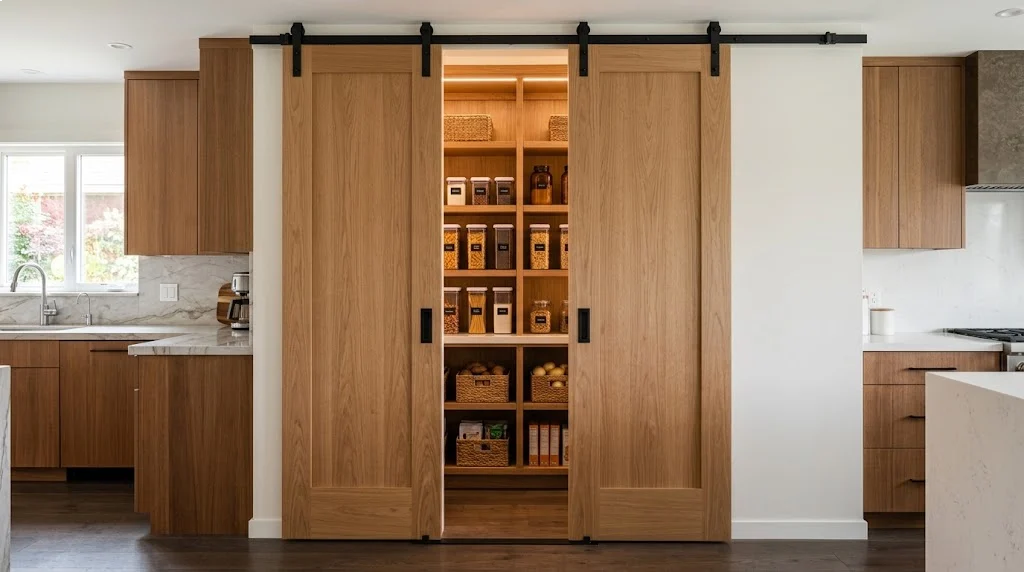
Bypass sliding doors run on a track mounted above the opening. The doors overlap each other as they slide, so you never need clearance for a door to swing open. This makes them a smart pick for pantries, closets, and laundry rooms where space is tight.
Unlike a single sliding barn door, bypass doors cover the full width of an opening with two or more panels. You get access to the whole space just by sliding a panel to one side. The system runs quietly and smoothly once installed correctly.
Popular Styles of Bypass Doors
Your choice of door style changes the look and function of the finished project. Here are the five most common options:
- Flat panel doors: A smooth, simple surface. These fit almost any interior style and cost less than more detailed options.
- Glass doors: These let light pass through the pantry opening. Choose frosted glass for privacy or clear glass for a more open feel.
- Louvered doors: Horizontal slats allow airflow. These work well for laundry rooms and any space that needs ventilation.
- Mirrored doors: These double as a full-length mirror. Popular in bedrooms, but less common for pantries.
- Raised panel doors: Decorative panels add texture and a traditional look. These suit older homes or classic kitchen styles.
Pick a style that matches your kitchen’s existing trim and cabinetry. A mismatched door style stands out for the wrong reasons.
Tools and Materials You’ll Need
Gather everything before you start. Running to the hardware store mid-project slows you down and breaks your momentum.
Materials:
- Bypass door hardware kit
- Interior doors in your chosen style
- Primed trim pieces
- Screws and fasteners
- Shims
Tools:
- Drill driver
- Forstner bit
- Level
- Measuring tape
- Track saw or circular saw
- Brad nailer
Buy a hardware kit that matches the weight and width of your doors. Most kits list a maximum door size, so check that before you buy.
Step 1: Measure the Opening
Accurate measurements make or break this project. Measure the width and height of your opening at multiple points, not just once at the top.
Older homes rarely have level floors or square openings. Tom Silva, general contractor for This Old House, checks this by measuring down from a level line to the floor at both sides of the opening. If the two measurements don’t match, your floor isn’t level, and you’ll need to adjust for it.
This Old House Magazine puts it simply: an opening that’s level, plumb, and square makes for an easier install, though these qualities are rare in older homes and plenty of newer ones. The fix isn’t to rebuild the opening. Instead, pad out the jambs with extra material to square things up before you mount any hardware.
Pro tip: Write down every measurement as you take it. It’s easy to forget a number and have to re-measure later.
Step 2: Install the Track
The track carries the full weight of your doors, so this step matters more than any other. Mark where the track will sit at the top of the opening, then check it with a level before you drill a single hole.
Follow these steps:
- Mark the screw hole locations along your level line.
- Drill pilot holes at each mark.
- Attach the track using the screws from your hardware kit.
- Check the track for level again after mounting.
- Add shims behind the track wherever it needs adjustment.
Don’t skip the second level check. A track that looks straight by eye often isn’t, and a crooked track means doors that drift open or closed on their own.
Step 3: Prepare the Doors
Doors rarely fit an opening at their factory height. Measure from the floor to the track, then subtract half an inch for clearance. Mark this height on each door before you cut.
Use a track saw or circular saw for a clean cut. Then attach the roller hardware to the top of each door, placing the rollers about an inch in from each edge. Secure the rollers with the screws included in your kit, and make sure they sit level and aligned with each other.
How to prevent chipping when cutting:
- Apply painter’s tape along the cut line.
- Score the line with a utility knife before you cut.
- Brace the saw on a cutting guide.
- Keep the blade on the waste side of the line.
- Cut slowly to avoid tearing the wood veneer.
This small step protects the finish on your doors and saves you from sanding out chipped edges later.
Step 4: Hang the Doors
With the track mounted and doors prepped, you’re ready to hang them. Lift the first door and guide the rollers into the track. Repeat with the second door, then slide both back and forth to check for smooth movement.
Next, install the floor guide. Center it in the opening and check that both doors fit into its slots without binding. Screw the guide into the floor once you confirm the fit.
If a door catches or drags, don’t force it. Check the track for level first, since a small dip or rise in the track causes most sliding problems.
Step 5: Add the Finishing Touches
Your doors now hang and slide, but a few final details make the project look finished.
Add door pulls:
If your doors are flat, measure 36 inches up from the floor on each leading door and mark the center from side to side. For paneled doors, find the center of the middle rail instead, since a pull placed there looks more balanced.
To find the exact center, hold a straightedge diagonally from one corner of the rail to the other and make a small mark. Repeat with the opposite diagonal. The point where the two lines cross marks the center. Drill a 3/16-inch hole at each mark and attach the pulls.
Install trim:
Cut a piece of 1×2 stock to the width of the opening. This covers the track and hides the hardware from view. Prime the trim and let it dry fully before installing it.
Drill pilot holes through the underside of the trim into the header using a 1/16-inch bit, then secure the trim with trim screws. Fill the screw holes with wood filler and sand smooth before painting.
Check your work:
Slide both doors through their full range of motion. Look for any spots where they drag, stick, or rattle. Adjust the rollers or track as needed until the doors move without resistance.
How to Maintain Bypass Sliding Doors
A little upkeep keeps your doors running smoothly for years. Build these three habits into your regular cleaning routine.
Clean the track regularly. Dust and debris build up in the track over time and cause doors to stick. Wipe the track weekly and clean the doors with a damp cloth as needed.
Lubricate the track twice a year. Apply a silicone-based lubricant to the track every 6 to 12 months. Wipe away any excess so it doesn’t attract dust, then test the doors to confirm they slide freely.
Inspect the hardware. Check rollers, screws, and the floor guide every few months for wear. Replace any worn parts right away, since a failing roller can cause a door to jump the track.
Choosing the Right Doors and Hardware
For a standard pantry opening, look for interior doors that haven’t been pre-hung and don’t have bore holes for a standard knob. Pre-hung doors come with a frame you don’t need for this project, and bore holes leave an unwanted hole once you switch to finger pulls.
JELD-WEN Colonist Primed wood interior doors are a common choice for this type of project, since they come in standard sizes that fit most pantry openings. For the hardware, Johnson Hardware makes bypass door kits that include everything you need to mount two doors on a single track.
Most home centers carry both the doors and hardware kits needed for this project, along with the trim, screws, and shims.
Final Thoughts
Installing bypass sliding pantry doors is a manageable weekend project for most DIYers. The keys to success are accurate measurements, a level track, and patience during the finishing steps. Get those three things right, and you’ll end up with doors that slide smoothly and look like a professional installed them.
The payoff is worth the effort. You gain full access to your pantry, save the floor space a swinging door would use, and add a clean, updated look to your kitchen.